Electric-GS is an experienced manufacturer of medium voltage and low voltage electrical equipment in Yueqing, Zhejiang, China. This engineering guide helps buyers, contractors and engineers make correct and safe decisions for power distribution and renewable energy projects.
Why Correct Combiner Box Installation Matters
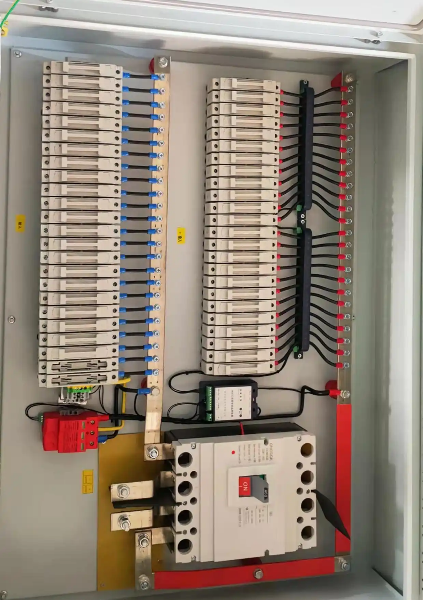
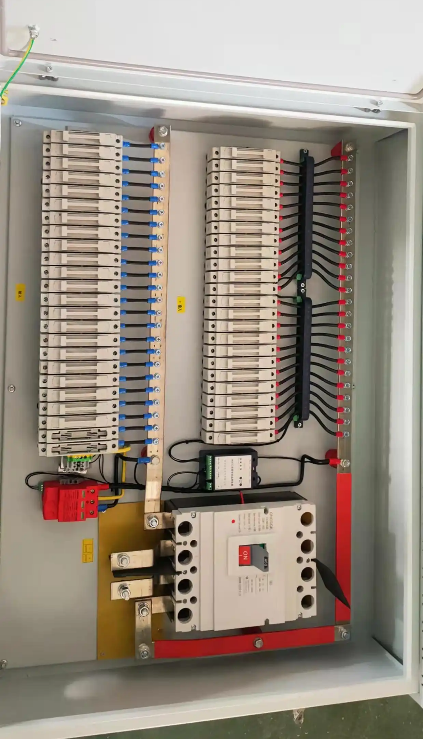
The PV combiner box gathers multiple DC strings into one output and protects each string with fuses and surge protection. A poorly installed combiner box is a fire risk, a source of ground faults, and a maintenance headache. This step-by-step guide covers everything from mounting to final testing, so your solar installation is safe and reliable for decades.
Before installation, make sure you understand the difference between a combiner box and a junction box by reading our PV combiner box vs solar junction box guide.
Tools and Materials You Will Need
- Combiner box with DC fuses, SPDs and disconnect switch
- DC cable with correct cross-section and PV1-F or H1Z2Z2-K rating
- MC4 or similar DC connectors
- Torque screwdriver, crimping tool, multimeter
- Insulation resistance tester and voltage tester
- Mounting brackets, cable glands and cable ties
Step 1: Mount the Combiner Box
Mount the box on a rigid vertical surface close to the string entry point and the inverter. Leave enough clearance in front for opening the door and working on terminals. For outdoor boxes, verify the IP rating matches the site (IP65 for exposed locations) and use sealed cable glands pointing downward to prevent water entry.
Step 2: Plan and Route the DC Cables
Route string cables from the modules to the box in a dedicated conduit or tray, separated from AC cables. Keep cable lengths as equal as possible between strings to minimize mismatch. Use the correct cable cross-section for the string current and length to keep voltage drop below 1-2%.
Step 3: Connect the String Inputs
| Connection | Requirement |
|---|---|
| Positive busbar | Fuse holder + fuse per string |
| Negative busbar | Direct connection or fused per design |
| String fuse rating | 1.25 x Isc per module string |
| Polarity check | Verify before closing the box |
| Torque | Follow manufacturer values |
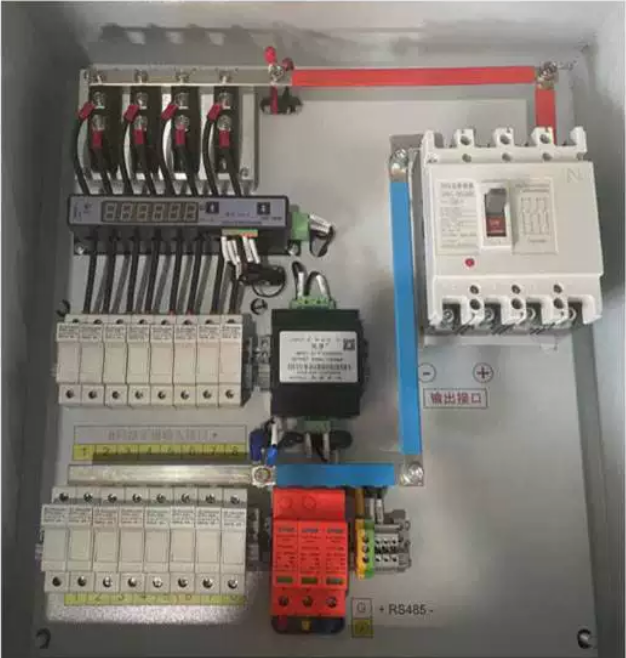
Connect each string positive to its fuse input and negative to the negative busbar. Label every string clearly with its number and polarity. Double-check polarity with a multimeter before energizing.
Step 4: Install Surge Protection Devices
Install Type 2 DC surge protectors between each busbar and earth. Verify the SPD’s max continuous DC voltage is above the system voltage, and connect its earth terminal to the main earth bar with a short, thick conductor. The SPD indicator window must show green before energizing.
Step 5: Connect the Output to the Inverter
Connect the combiner box output (positive and negative) to the inverter DC input terminals using cable rated for the total current. Install a DC disconnect switch at the inverter, and make sure the inverter is turned off and locked before connection. Follow the correct tightening torque and check the inverter’s maximum DC input voltage and current.
Step 6: Test Before Energizing
- Insulation resistance test: each string to earth, >1 MOhm at 1000V
- Polarity verification: positive and negative voltages correct
- Open-circuit voltage check per string
- Continuity check of fuses and connections
- SPD indicator check
Step 7: Energize and Commission
Close the DC disconnect at the inverter, then close the combiner box switch. Check the inverter display shows the correct input voltage and current per string, and verify there is no arcing or abnormal heat. Record all test values in the commissioning report and keep it with the system documentation.
For larger plants, the same logic applies to feeder combiner boxes in the DC collection network. Electric-GS supplies combiner boxes from 4 to 32 strings with optional monitoring and DC breakers.
FAQ About Solar Combiner Box Installation
Can I install a combiner box myself?
Only if you are a qualified electrician with PV experience. DC voltages can exceed 1000V and are extremely dangerous.
How many strings can one combiner box handle?
Typical sizes are 4, 8, 12, 16 and 32 strings. Choose based on your inverter’s MPPT count and the physical layout of the array.
Do I need a fuse for every string?
Yes, when three or more strings are paralleled, each string must be fused to protect against reverse current from other strings.
What IP rating do I need?
Indoor boxes: IP54 minimum. Outdoor exposed boxes: IP65 with sealed glands.
Can the combiner box be mounted in direct sun?
Avoid direct sun exposure if possible, because internal temperature rises shorten the life of electronics and fuses.
Where can I get a quote for a combiner box?
Contact Electric-GS at info@electric-gs.com with your string count, system voltage and monitoring requirements.
Combiner Box Maintenance and Troubleshooting
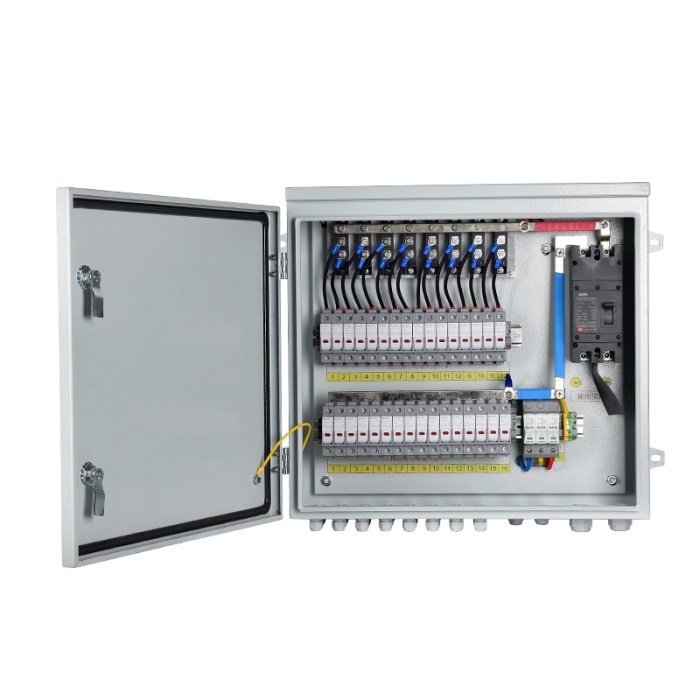
After installation, schedule a simple annual check of the combiner box: open the cover, inspect for discoloration or heat marks on terminals, verify fuse condition with a multimeter, check the SPD indicator window, and measure string voltages against the commissioning values. A string voltage that is clearly lower than the others usually means a failed module or a loose connector in that string.
When a string current drops to zero, first check the fuse, then the MC4 connectors, then the module string itself. Keep a small stock of spare fuses and SPD cartridges at the site so a fault does not keep the string offline for weeks.
Also record the box serial number, the string map and the commissioning values in the system logbook. This documentation is essential when the inverter reports underperformance and you need to identify which string is affected. For more PV wiring guidance, read our combiner box vs junction box guide, and for a full solar product range visit electric-cn.com.
Finally, keep the box cover closed and sealed after every visit, because dust and moisture are the two main enemies of DC terminations inside the enclosure.
For the full solar DC distribution product range and sizing help, contact our engineers at this PV combiner guide.
Finally, keep the box cover closed and sealed after every visit, because dust and moisture are the two main enemies of DC terminations inside the enclosure.
For the full solar DC distribution product range and sizing help, contact our engineers at this PV combiner guide.
About Electric-GS
Electric-GS is a professional OEM/ODM factory in Yueqing, Zhejiang, China, specializing in ring main units, gas insulated switchgear, vacuum circuit breakers, transformers, LV/MV switchgear and solar power distribution equipment. All products are manufactured with strict quality control and IEC standard testing. For quotations, drawings or customization, contact us at info@electric-gs.com or WhatsApp +86 135 8897 8050.
2 thoughts